Introduction to Swiss Design
Swiss Design Style, is also known as the International Typographic Style. It is a graphic design style developed in Switzerland, Europe in the 1950s that values and focuses on cleanliness, readability and objectivity.
Typical features of the style are:
Asymmetric layouts (what is asymmetry?)
Use of a sans-serif typefaces (what typeface have you been using recently that is a sans-serif typeface?)
Use of text that is flush left (the text is aligned along the left margin) or ragged right text (the text is aligned along the right margin).
Many of the early Swiss Design Style works featured ‘Typography’ as a primary design element, which means they focused more on typography because it’s the root of communication and then pictures and other design elements comes as a secondary design elements and this is the reason the title ‘International Typographic Style’ has the word ‘Typography’ with it.
---
---
---
---
---
Swiss Design exploration Brief
- Research
Research into the Swiss Style designer Mike Joyce
VISIT LINKS https://www.stereotypenyc.com/about/
https://www.awwwards.com/swissted-the-rock-posters-of-mike-joyce.html
https://www.interviewmagazine.com/culture/mike-joyces-swiss-style
https://www.pinterest.co.uk/armandcordero/swiss/
...and the Swiss Design movement to help you develop your knowledge and understanding of the style.
As part of your 50/50 further reading, visit these sites for further development:
https://99designs.co.uk/blog/design-history-movements/swiss-design/
https://medium.com/@charchitgarg27/international-typographic-style-cd99a24721ad
Instructions:
Task 1.
For Side 1. You are to produce 16 designs in the style of Swiss Design designer Mike Joyce, to fill 1 A3 side (see example below).
For inspiration, you will use Mike Joyce's 'Swiss Design Rock Posters' to inspire your 16 designs. https://www.awwwards.com/swissted-the-rock-posters-of-mike-joyce.html - reference images of Joyce's Rock Posters can be downloaded below (see Download Instructions below).
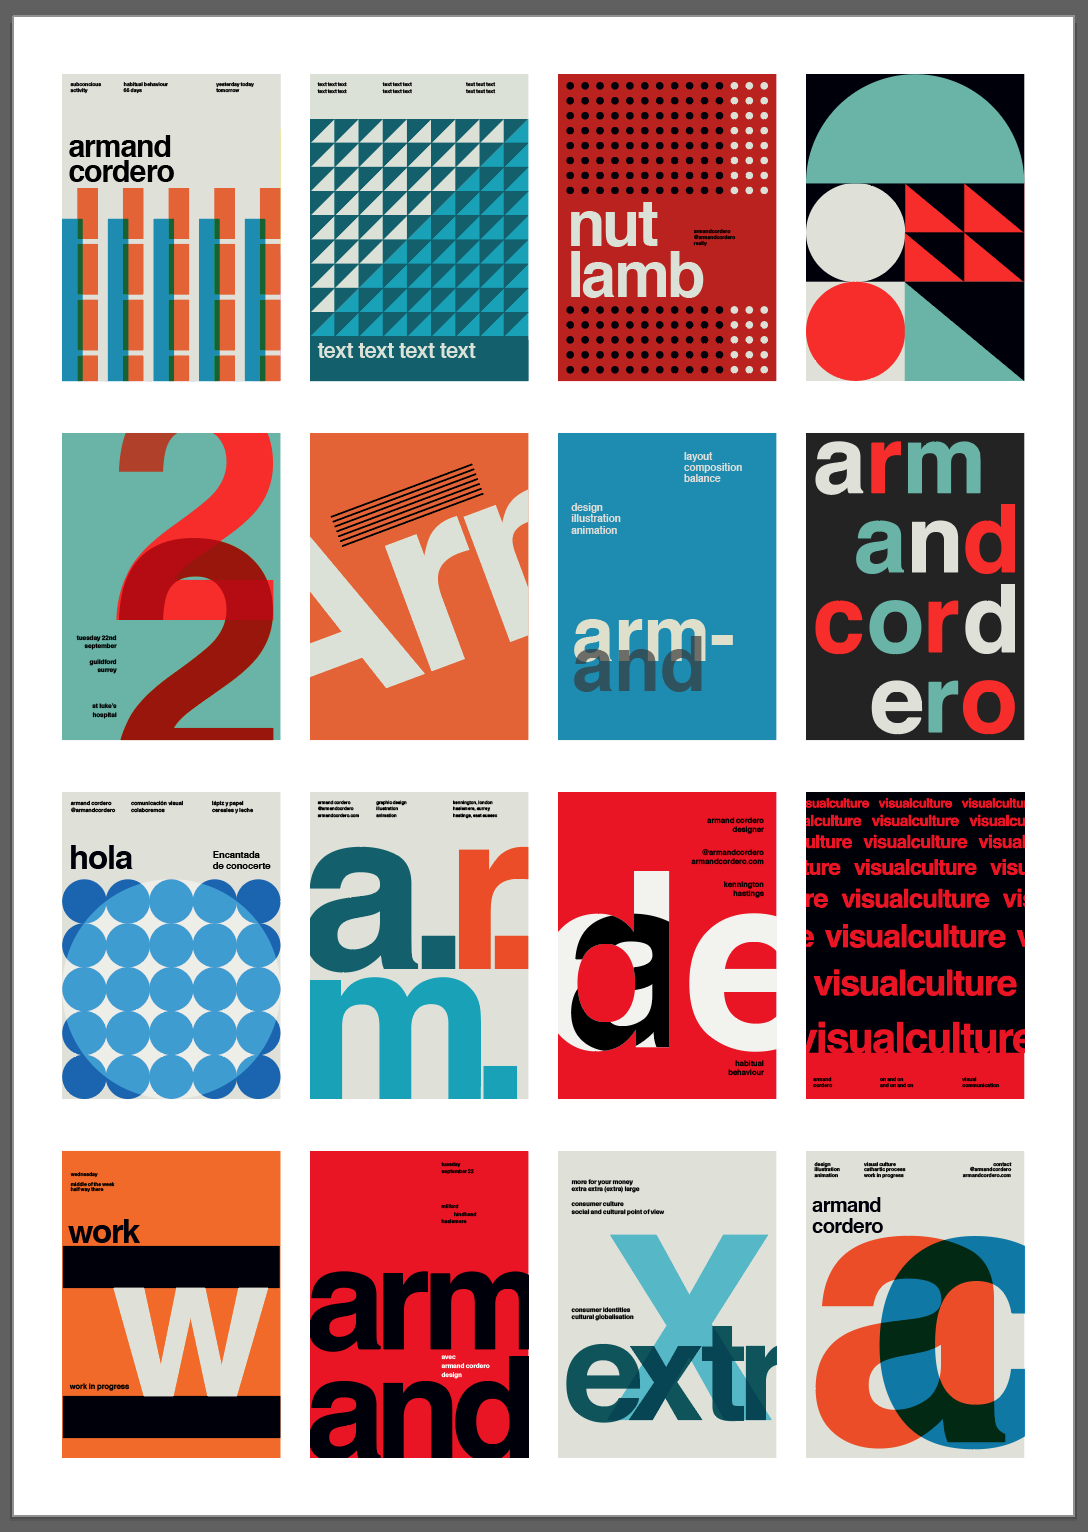
Examples by current students:
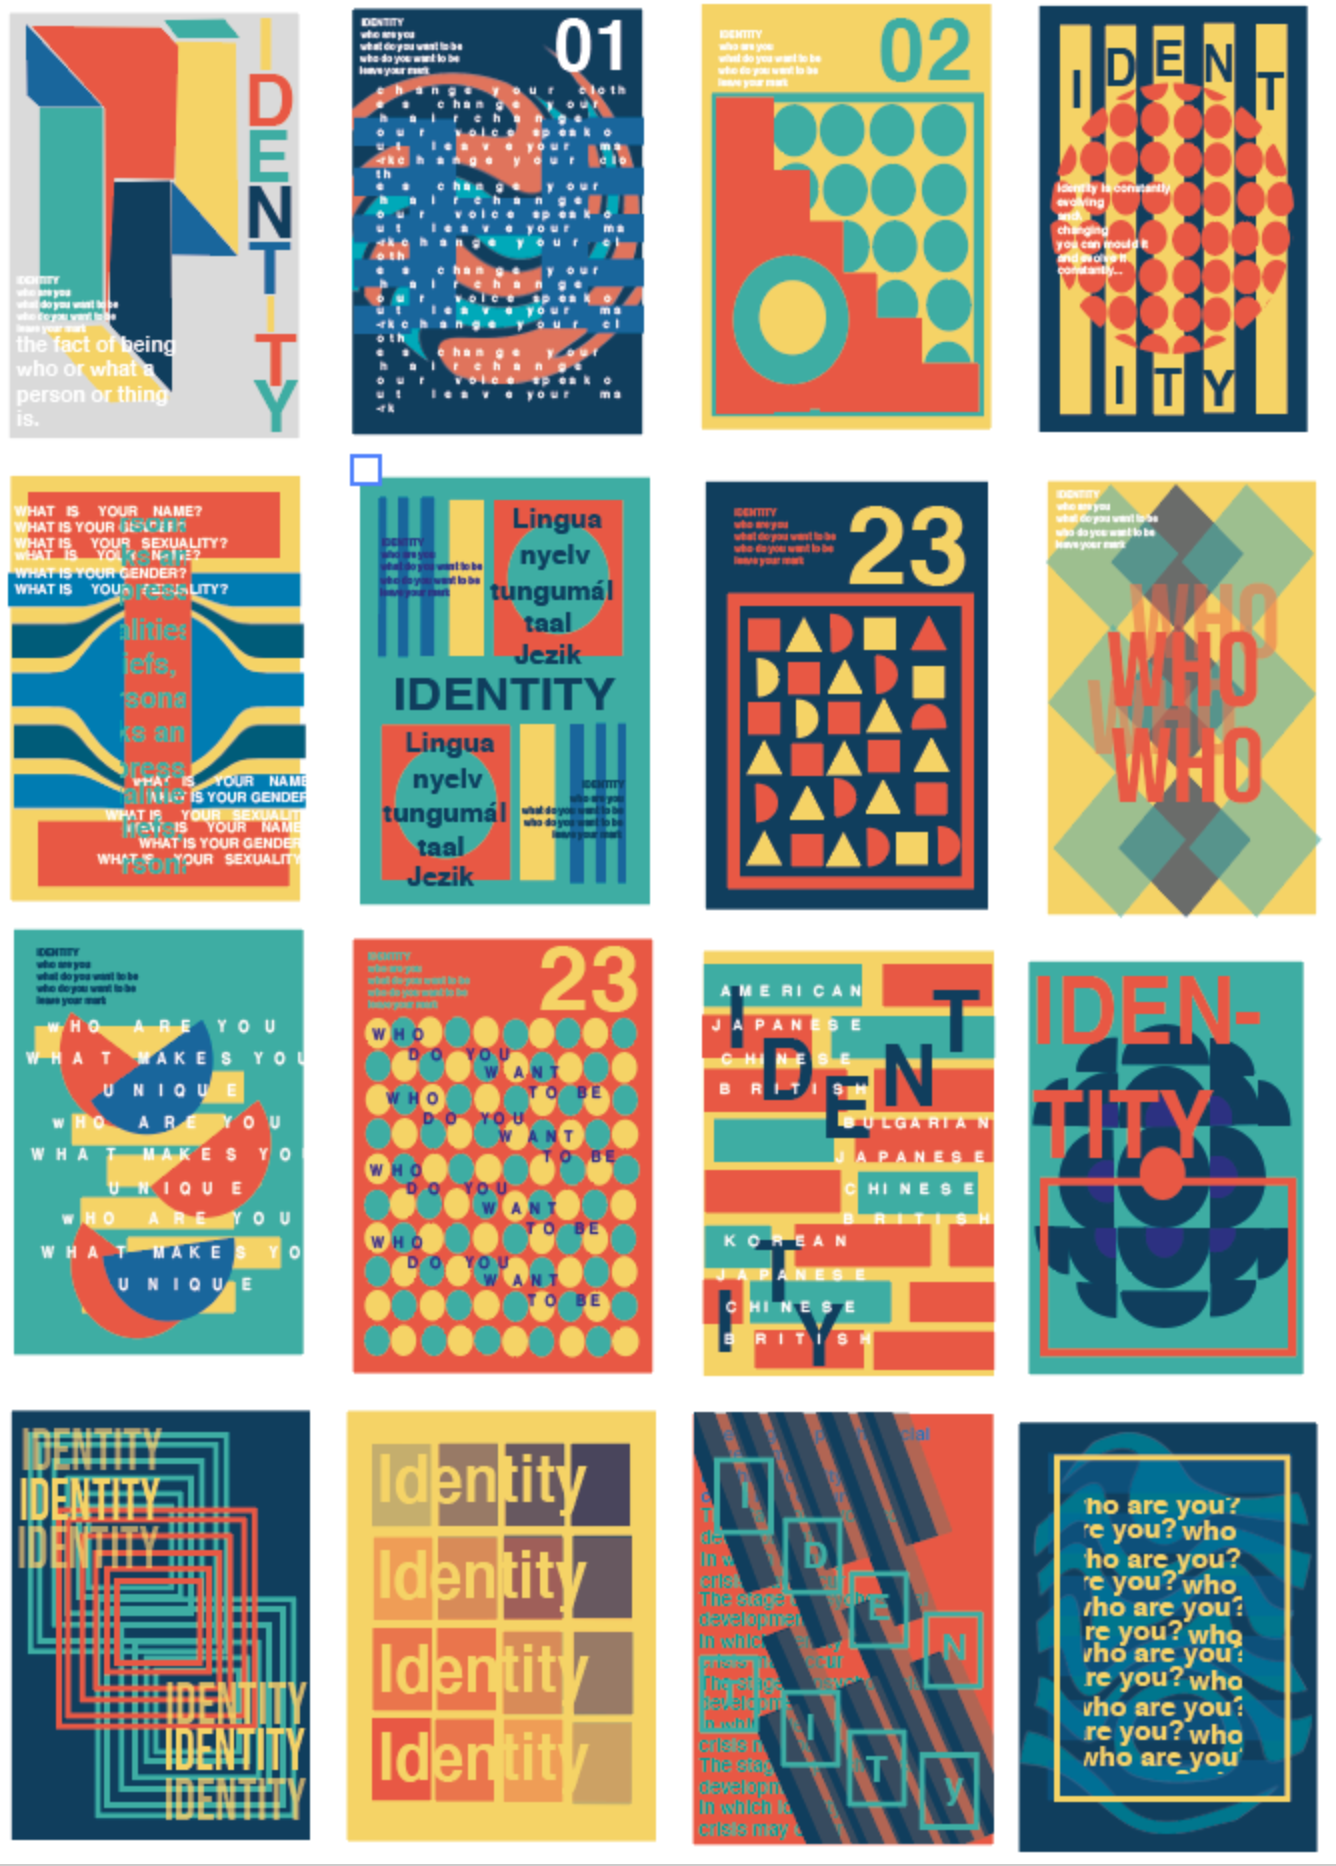
For inspiration, you will use Mike Joyce's 'Swiss Design Rock Posters' to inspire your 16 designs. https://www.awwwards.com/swissted-the-rock-posters-of-mike-joyce.html - reference images of Joyce's Rock Posters can be downloaded below (see Download Instructions below). Use Adobe Illustrator (use Illustrator template file below, to help you get started). Your 16 designs need to have a cohesive theme to act as a strong series, so ensure that the text for all 16 designs is related to one theme e.g. you as a designer (see Visual Communication below).
- Download Instructions
On the computer, create a new folder in your Graphics folder in your user area, name the folder 'Swiss Design'. Download the resources below including examples of the task, reference images of Mike Joyce designs and resources (e.g. templates)
Reminder - when you download resources from Godalming Online, you may see your download as a zip file. In order for you to use the resources, you will need to open the zip folder and copy and paste the contents of the zip folder into a new folder in your user area e.g. your 'Swiss Design' folder, which you created in your 'Graphics' folder in your user area.
- Visual Communication
What would you like to communicate with your Swiss Design inspired series of designs? What is the purpose of your designs? What message would you like to visually communicate? You will need to decide on a theme for your designs. e.g. all 16 of your designs could be related to you as a designer, promoting your skills and interests OR your designs could be related to the Swiss Design movement, using research about the movement to create the text for your designs. This approach will help to keep your designs to be cohesive and work effectively as a series.
- Typographic Systems
As discussed in lesson, you can use your knowledge and understanding of the Typographic System, 'Grid System', to help you with arranging your typography and non-objective elements (e.g. shapes, lines etc.) in your designs. You can use the lines of the grid to help you position text.
- Helvetica
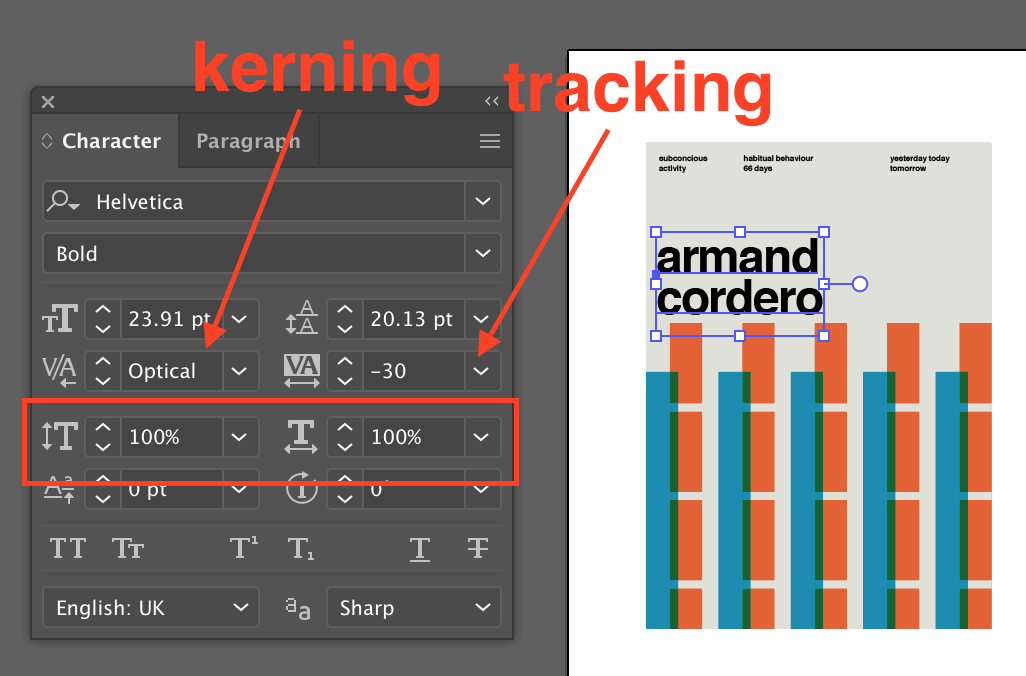
As shown in the demonstration and briefing of the lesson, you will use the typeface 'Helvetica Bold' for your Mike Joyce inspired designs (download 'Helvetica instructions file' below as a reminder of what the settings are). Helvetica is closely linked to the Swiss Design style.
Helvetica settings: for kerning (space between letters), select 'Optical' from the drop-down menu instead of the default 'Auto'; for tracking (space between all letters), use setting '-30'; make sure that you are not distorting the scale of your Helvetica typography - the 'Vertical' and 'Horizontal' scale should be 100% for all Helvetica text (see red box highlighted area in image below).
- Organisation
You have been advised to keep your Illustrator document by creating a new layer for each design. Trust me, it makes the design process so much easier to edit as you go along. It also avoids Adobe Illustrator from crashing as you can 'hide' layers as you go.
- Refinement
Ensure that your designs are consistent in quality and refinement. Spend time to refine and edit each design. Remember, your skills are much stronger than they were when you first started using Adobe Illustrator. You will continue to develop your skills during this project, learning how to work efficiently and effectively.
- Reflection
Teacher will provide you with feedback to develop designs. You are expected to reflect on your designs and ask others in your class what they think of your work. Offer constructive feedback to others and learn from each other. Write down notes so that you remember your reflections and feedback. Type your annotations as you go (annotations to neatly presented on tracing paper flaps) - size 10pt.z
Task 2.
Create 3 banner designs Tracing paper flap overlays x3 (each flap with dimensions approx. 9cm x 37cm - use the 'banner design template for tracing paper overlay' Illustrator file - download below). Example below
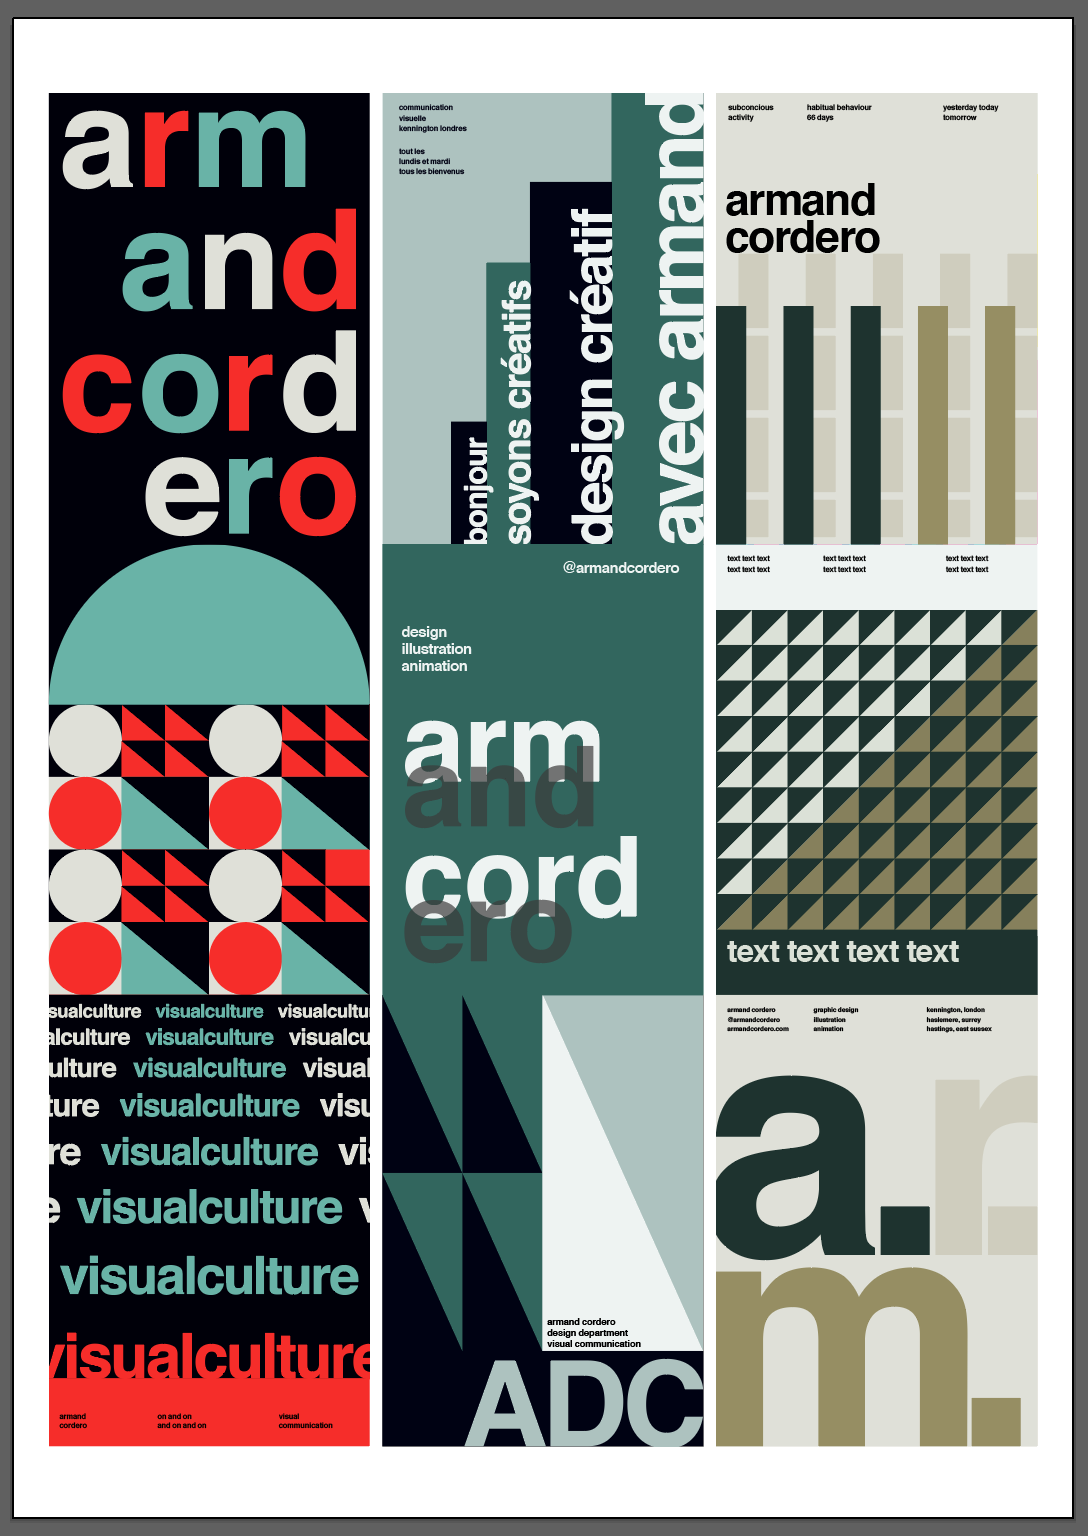
Examples by current students:
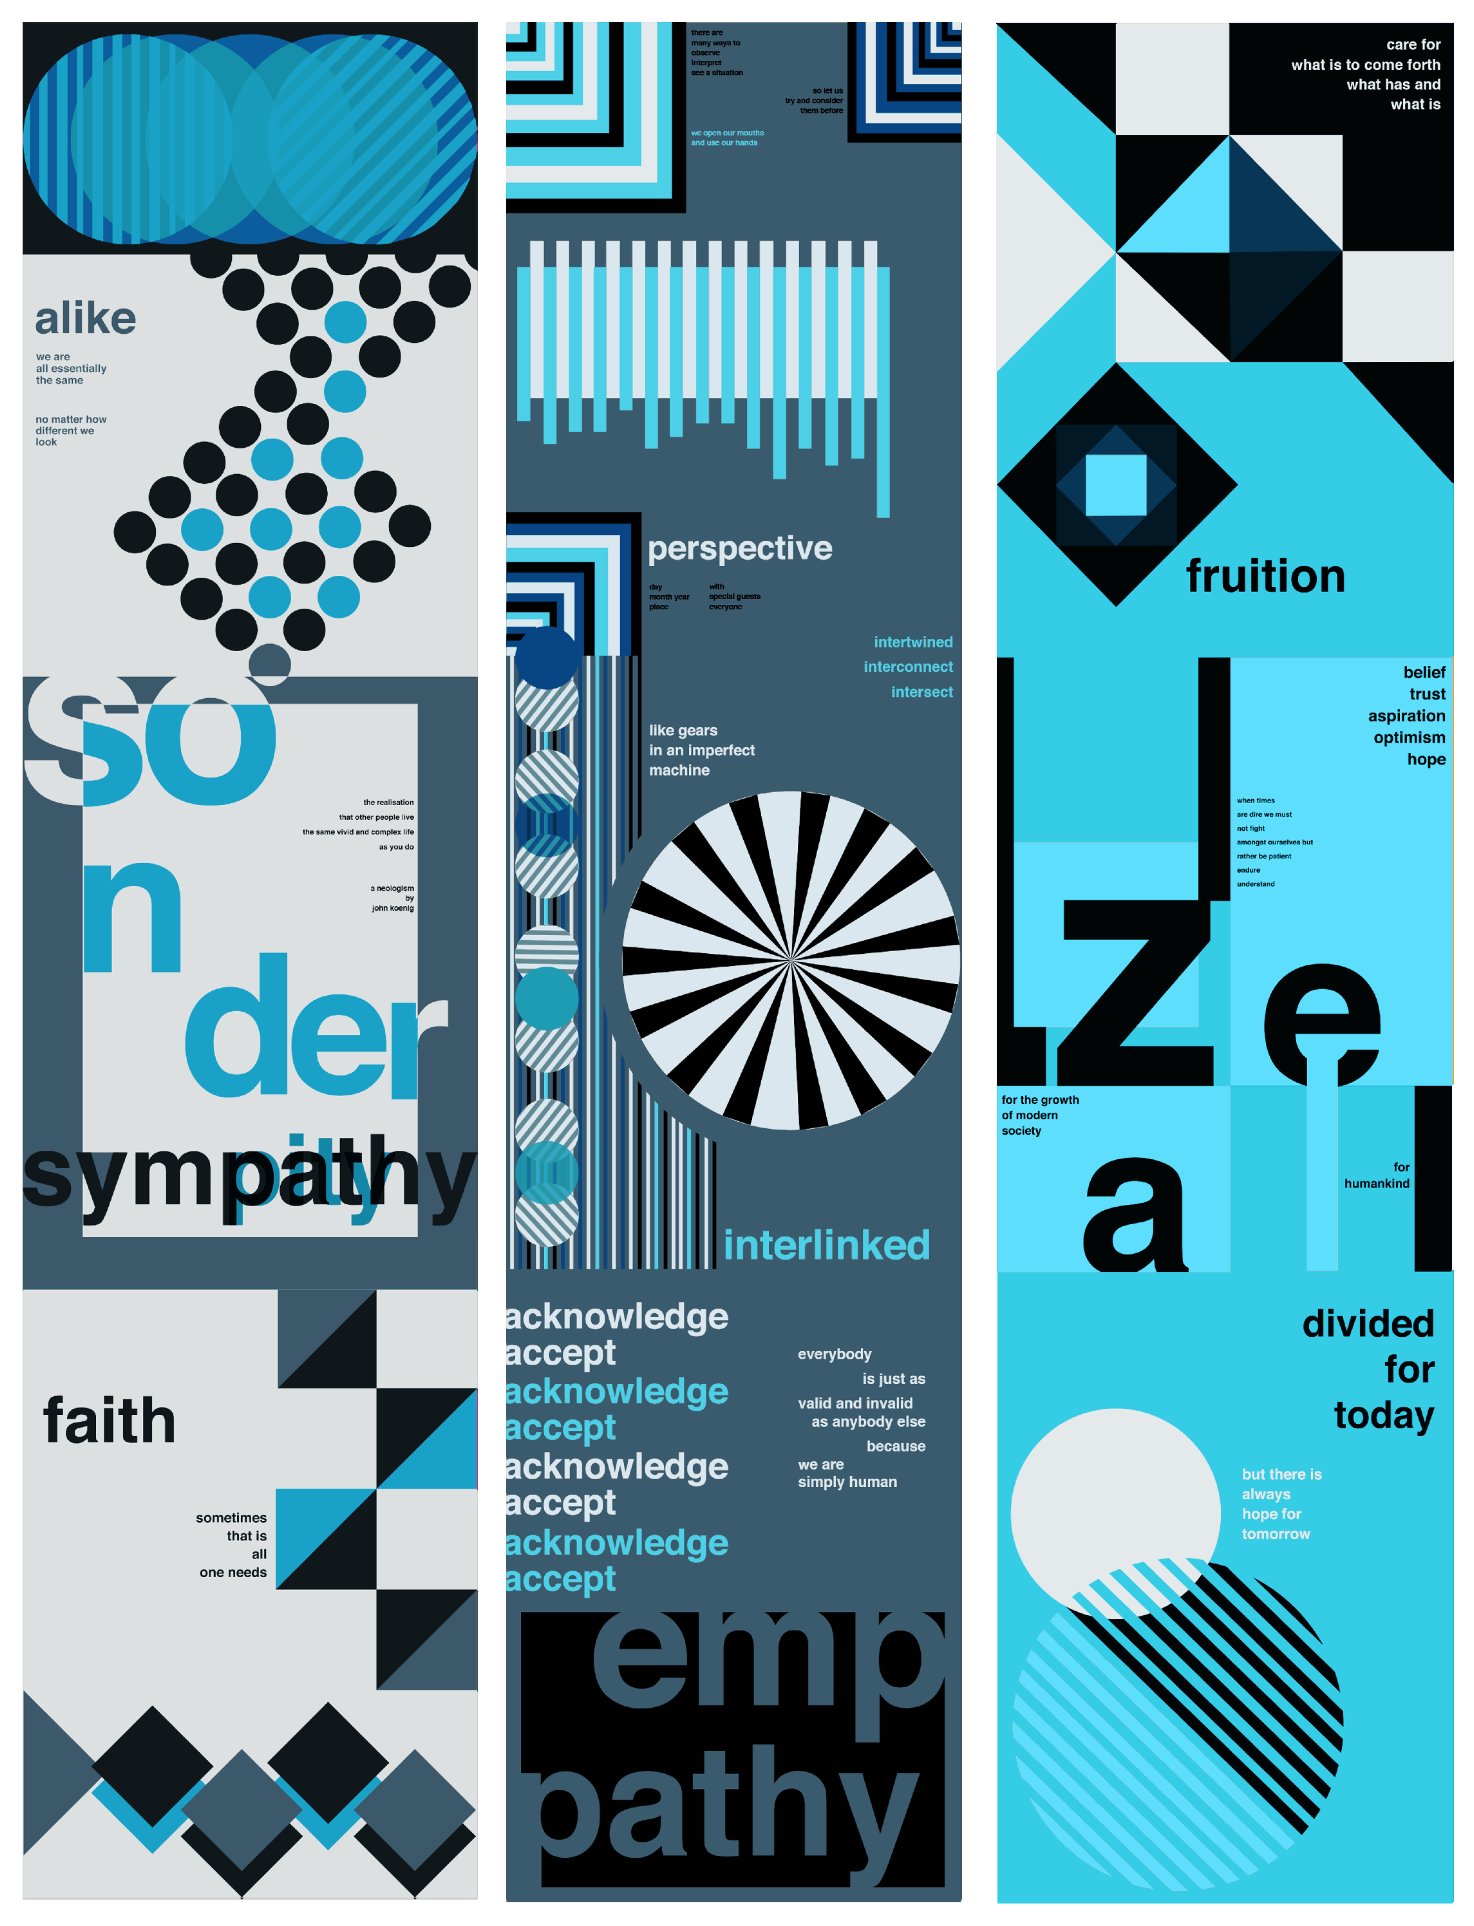
For each of your 3 new banner designs, you will reflect on your work and progress and select three of your 16 designs, which you will combine to create a new banner design. You may need to tweak your designs and edit the colour palette to ensure the three combined designs work effectively together.
Print your 3 banner designs onto A3 tracing paper, trim paper after printing and attach as flaps to side 1. Reminder - Swiss Design project will be presented on pages 12 and 13 of A3 book.
Task 3.
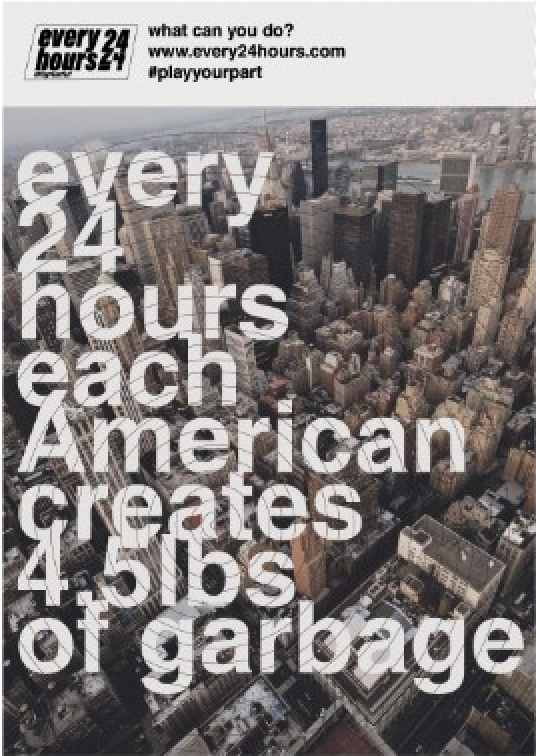
To reinforce your existing knowledge and understanding of the Typographic Systems. You will use Typographic Systems (e.g. Random, Dilational etc.) to create a series of 4x A5 flyer designs in the style of Swiss Design. Ensure that sans serif typography is still the primary element of the design.
What is the purpose of flyer designs? Why is promotion and advertising important? What will you be promoting or advertising with your flyer designs? Carefully consider the colour palette of your design? How will you effectively use hierarchy of text in your designs?
Continue to use typeface Helvetica Bold (or Arial Bold), however, as a designer you may choose to experiment with your use of Helvetica e.g. repetition, layering, split text by converting text to outlines, drawing lines on top or drawing shapes on top, and using 'divide' in Pathfinder to split text, distort text using an effect etc.
Theme update:
- Create your A5 flyer designs so that they visually communicate the same theme you have explored in tasks 1 and 2.
You will need to select a theme for your 4x A5 flyer designs, please select one of the following themes for promotion:
(1) Promoting Climate Change (relevant to current affairs and protest movements)
(2) Politics (your designs could be related to the media, general election, Brexit etc)
(3) Graphic Design (promoting yourself as a designer)
Additional Research
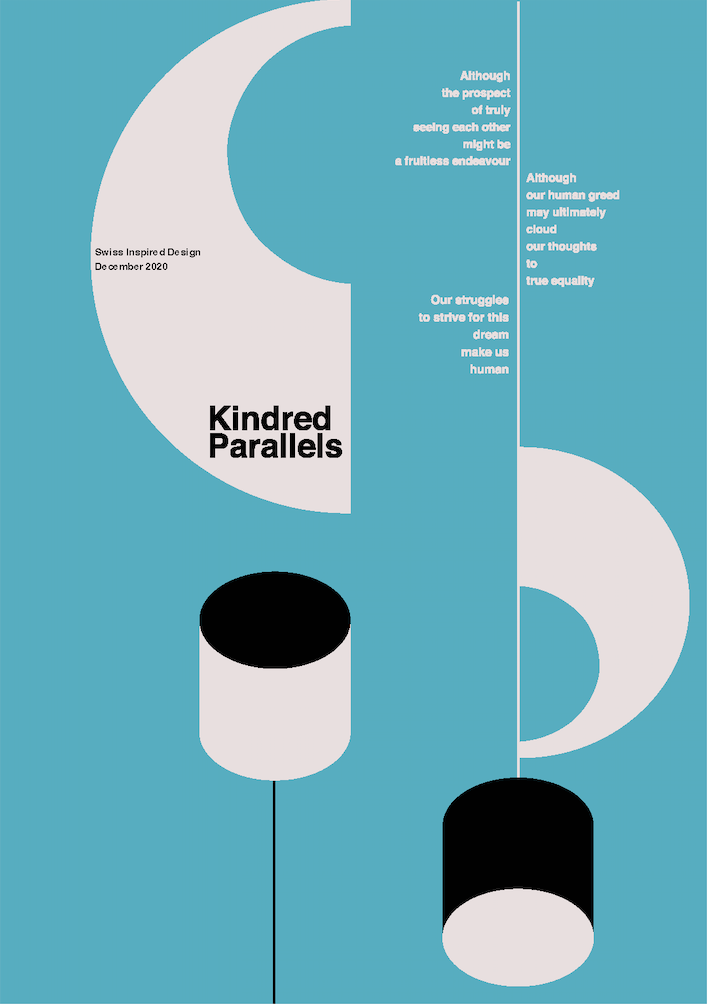
At this stage, you are encouraged to look at additional research to find other Swiss Design designers to broaden your perspective of the design movement. Suggestions:

Presentation
You will need to reduce the size of your 4 A5 flyer designs so that they fit neatly on an A3 portrait document. Present Task 3 on side 2 (right page) of the Swiss Design project.
Annotation
You are to write 200 words, reflecting on your thoughts of your designs. As discussed in lessons, use the following guide to recap how you can annotate and write about designs:
https://online.godalming.ac.uk/mod/resource/view.php?id=70171